Friday, December 28, 2012

Renovation starts on the Basement!

When we bought this house the basement was considered finished.  You know how it is, once everything is moved out you start to see all the imperfections and the wheels start turning on how you can make it your own.    

The cement is painted, which makes for very cold toes, and in one of the bedrooms there is construction grade linoleum glued to the floor.  

So needless to say the basement is a catch all for whatever we throw down the stairs.

Here are the befores.......


First things first the moldings must come off!!!

The easiest way to get molding off is to first run a razor blade down the edge as shown.  This will break the seal of caulk and paint and hopefully minimize ripping paint and sheetrock off with the moldings.


 Next grab a hammer, a flat screwdriver, a crow bar, or anything you can get between the wall and the moldings to pull them up!  Start at one edge and work your way down!


All of our moldings are off!!  Texturing and painting tomorrow!!!

TTFN

Brooke

Friday, December 21, 2012

Turquoise Headboard...just in time for Christmas!

I love when random people find me through ads and we just hit it off!  This lady was looking for a headboard for her daughter, she wanted it fun to match her bed spread!

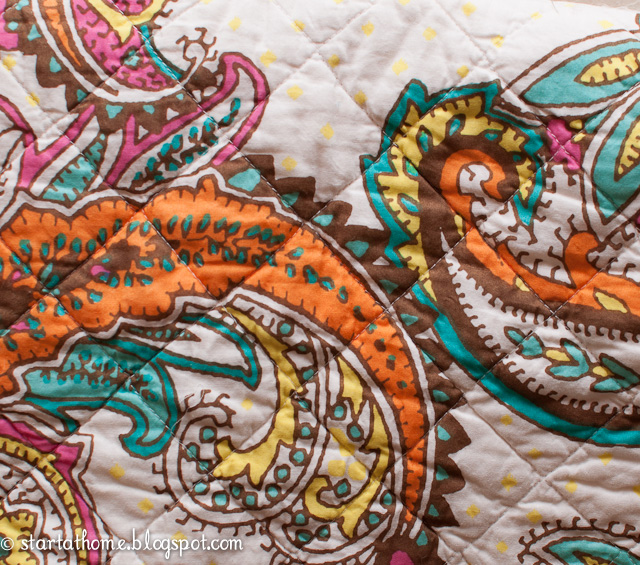
Here is a peek at the bed spread!
She loves the turquoise color in this bed spread and wanted to bring it out in the headboard!  


We found this super fun headboard and took a pillow sham in to match the color!!  A perfect match!!!

Here is the bed right out of the spray room!  I LOVE this color!  
But any bed always needs a little more personality......


That's where the sand paper and stain comes in!  I ran my sander over the edges to really make this bed fun and antiqued.  Antiqued is always a good idea when you have kids, if they ding the furniture it just adds more character!  After I sanded it down I rubbed it with a stain to darken it and really add some depth to the bed!


I love this bed, it was so fun!!

I hope everyone has a very very Merry Christmas!!!

Wednesday, December 19, 2012

Ballerina Party!

December is always a little crazy at our house!  But, we will not complain, we are so blessed to have our baby girl.  Yes, she was a bit unexpected but the best Christmas present you could ask for!  She was actually due on Christmas Day, but made her first appearance a little early.

This was our first ever friend Birthday party.  I was a little worried about entertaining 10 little girls but it was so much fun and they were all so good!


Her favorite colors are Gold and Pink, the perfect colors for a ballerina party.  I found the candy at Orson Gigi, I love all their color sorted candy as well as plates, napkins and utensils.  Makes my life a lot easier.  
For party favors, I bought cute little pink cellophane bags, at the end of the party we filled the girls bags with the yellow gum balls, the lemon flavored Jelly Bellies, and the pink taffy.


I made this cake!!  I was planning making a ruffled cake but it was late and the tip I needed for a ruffle cake walked off, here is plan b and I am very pleased with the outcome!  Yes, if I made this cake so can you.  Believe me when I say cooking is not my strong point.


 I also made the cupcakes.  The little ballerina toppers I found on Etsy.  I printed, cut them out and taped them to toothpicks!  The girls loved getting a cupcake with a ballerina on top.


I really wanted a nice backdrop for pictures and opening presents, probably the photographer in me!  I had this fabric from a previous photo shot, so I duck taped it to the wall over my door.  I found the chair at a garage sale and painted it yellow, and of course every little ballerina needs balloons.  


The party was so much fun.  However, mom is very tired, but a happy birthday girl made everything worth it.

HAPPY BIRTHDAY BABY GIRL, WE LOVE YOU!!

Brooke

Wednesday, December 12, 2012

Gathering Tutorial

I love the look of gathering, however I don't always love gathering.  With my luck I always break a thread or 2 and have to start over.  

My wonderful mother showed me a much easier way to gather thicker fabric!

What you will need:
A sewing machine
Your fabric (I used Burlap)
Thread
Embroidery Thread

First I cut my burlap into strips, Next lay your fabric out and decide how you want your ruffle to look, I wanted my burlap to ruffle on both sides so I ran my embroidery thread down the middle of my strips.

Make sure your embroidery thread is at least 6 inches longer than your fabric on both ends!


Adjust your machine to Zig Zag and you want your zig zag to be as wide as possible.  You don't want your stitch length too long but it doesn't have to be really tight either.   You want to zig zag right other the top of the embroidery thread DON'T catch your embroidery thread in your stitch or you will not be able to gather.


Once you have zig zagged over the length of your fabric you are going to HOLD the embroidery thread and begin pushing the fabric toward the center.  Make sure you don't pull the embroidery thread through on the other end.

And here is what a gathered piece of burlap looks like!


TTFN

Brooke

Tuesday, December 11, 2012

Some of my treasure I found on our treasure hunt!

My daughters and I made a little trip into SLC on Friday on the hunt for some fun furniture!  And get party supplies for my daughter's upcoming birthday!

I should know by now I don't take my children treasure hunting, but sometimes I really really crave looking.  Since we were already in SLC I decided to stop at a few places.  
First stop was Restore they were really great so I decided maybe we can handle one more store. We stopped at DI, a local thrift store, looking for a headboard in particular, I walked into the yard area and thought I found what I was looking for so I pulled it out, took pictures, sent pictures and then called my client to see if this is what she was looking for.  Right as I get on the phone my 1 year old decides to throw a fit, which includes throwing herself on the floor, screaming and kicking her legs.  I step to the side a little in hopes to hurry and finish up the conversation and then pick my daughter off the floor.  Just as I am about to end, I hear a crash and my 4 year old starts screaming,  in her attempt to climb out of the cart she tipped herself and the cart over and took a shelf down with her.  Embarrassed I ask my client if I can call her back.  Yes, at this point the whole store is looking at me.  So, needless to say I believe I have learned my lesson this time.  I will make sure I find a babysitter next time.

With all the commotion I did still find some fun treasures, and now they are available for custom refinish.


I love this vintage table on wheels, and all the fun detail.  The table is oval and can easily fit 6 chairs around it.  

Refinishing of this table starts at $225


Cute Desk with fun details
Refinishing starts at $175.


Please leave a comment or send me an email if you are interested.  Brooke.n.larsen@gmail.com

TTFN

Brooke

Friday, December 7, 2012

My real Christmas Tree!

It has become a tradition in our family to go pick out a real Christmas tree.  We don't go anywhere special, we went to Smith's Marketplace this year.  It is just fun to pick one out, and I love the smell.

This year Devin picked our tree.  In the lot this tree looked so perfect.  Not that it isn't perfect, but it is WAY larger than we original thought.  When we got it in our front room we realized how big it was.

 My daughter and I made most of the ornaments on this tree, but we didn't really anticipate a tree this big so we had to make a few more!

 
I gathered Burlap to help fill the space and add a vintage feel. (tutorial on gathering coming soon!!)


This is my favorite Ornament my daughter and I made.  The center is a wood drawer pull I turned upside down and hot glued the cinnamon sticks into and I glittered the center.


The glass ornaments are vintage ornaments my mom gave to me.  I love them!!


We also made this book page garland.  We cut pages into triangles and hot glued them on to twine!  This garland was an after thought, this tree was so full we needed more to make it look decorated.  I love the special touch it adds.

Here is a link to our Glittered Pinecones and Snowflakes tutorials

TTFN

Brooke

Thursday, December 6, 2012

Chippy Metal Beds!

I just bought my daughter a metal day bed.  Her room is so small I am hoping putting the bed up against the wall will help to free up some space.  The bed also came with a trundle, BONUS!  I have never really loved metal beds, maybe because I had one all growing up.
 I saw these beds and fell in love, it will bring the feel to her room I am looking for.  The only problem is I have to figure out how to get it to look like this.


Source: google.co.uk via Brooke on Pinterest


Wednesday, December 5, 2012

A hint a Christmas

I love to decorate for Christmas.  
This year I wanted to used the decorations I already had out and just add a little holiday spirit to them.  Maybe it is out of laziness but either way I like the way it turned out!

The pine needles are actually branches that fell off of my real tree and the pinecones are the cinnamon scented ones, so between the 2 my front room smells just like Christmas!


Here is a little peek at my real tree in my front room!  It is almost done, as soon as it is complete I will take pictures of it and post them.  

For this tree this year my daughter and I made most of the ornaments and decorations.  I am so please, so far, with how it is turning out.  


Happy Decorating everyone!!

TTFN

Brooke

Monday, December 3, 2012

Old Cupboard Door Turned Chalkboard

When we were remodeling I managed to save a few old cupboard doors.  I didn't know exactly what I wanted to do with them so they sat in my garage for a while!  Then it spoke to me, It wanted to be a chalkboard with fun vintage knobs on it!  I can handle that.

I love how it turned out!  I painted the frame with Annie Sloan's Duck Egg Blue Chalk paint and then added a dark wax.  The black is chalk board paint I purchased from Lowes.

The hardware I have just been collecting over time, and decided instead of letting them sit around I should probably put them to use.  Can you ever have too many hooks to hang things on?


TTFN

Brooke

Linking here
Costal Charm


Friday, November 30, 2012

Tree decorations don't have to be expensive!

My friend came over to my house the other day and said, "Wow, that looks like a Martha Stewart tree."  I had to laugh and say "why thank you!"

I love this tree.  The best part is almost all the ornaments are either from the dollar store or the day after Christmas clearance!  Oh, don't forget the star on top from Lost and Found Thrift!


The big balls I bought at Tai Pan the day after Christmas, they were probably still there cause they were  orange, but a little spray paint can fix that!  I sprayed them red.  After the spray paint was dry I sprayed the ball with a spray adhesive and dumped glitter all over!!


Instead of wrapping my tinsel around the tree this year I randomly stuffed it in the tree as a filler!

Look at my cute model and of course helper.  


My fun green stars were also the day after Christmas steal, but the rest of the ornaments were all found at the dollar store!  Who would have thought you can decorate a tree from the dollar store?


Here is also a little peek at my center piece.  The pine cones are scented, they smell wonderful every time I walk by!


I am a sucker for glass filled with something, and christmas is no exception.


TTFN

Brooke

Thursday, November 29, 2012

It is PURPLE!!

My WONDERFUL friend found this cute little desk on Craig's List for me.  
I love all the details and the hardware is just beautiful.  
It just needed some love, and life brought back in to it.  


Here she is all done and ready for a new home!


I haven't painted with chalk paint in a while and I was missing it.  This desk was the perfect fit. 
 I love the soft purple with white accents and the newly painted hardware.


One of the best and hardest parts of taking pictures of a piece is staging it.  I am always looking for a wall to put piece furniture up against, and wandering through my house to find the perfect items to place on the furniture.  I usually end up rearranging my other furniture and scrubbing floors and so on and so on, it seems to have a rippling effect!  Most of the time it all needs to be done I just need something to make me do it!  But when a picture truly showcases the beauty of what you have created the messes all seem to be worth it!


I had a very cute assistant today, aka mini me!  She was sick and camped out on the couch, but she wasn't sick enough to miss out on a photo shoot!!


This Desk is for sale if you are interested please see my furniture for sale tab at the top of my blog!

TTFN

Brooke

Friday, November 23, 2012

Custom Order

I always get a little excited and nervous for a custom order.  Custom orders can often push me out of my comfort zone as I try to deliver aka read my clients mind.  I always want my clients to LOVE their restored furniture.

Before:


After


I had never painted with this color before, so I was a little excited when my client asked for turquoise.  I love bright colors they always seem to bring a piece to life.  


We kept the old hardware and I love how it pops against the turquoise!  
This cabinet now has personality of it's own.


As for this roll top desk, whenever anyone asks me to paint something black I wince just a bit!  Black scares me for a few reasons:
First it is hard to get a paint to look black in different lighting
Second it shows EVERYTHING
Third it often looks dirty.
I am looking at my black entertainment center as we speak, my kids hand prints are all over it!

So, I experiment with this desk to see if I could get the look she was going for and eliminate some of the problems I have with black!

I used Minwax Polyshades in black.  The nice thing about this product is it is color and top coat in one. I ran it though my sprayer, smoothed it out with steel wool and I couldn't be more happy with how BLACK this desk is.  Since it has a poly on it for protection I am hoping it will clean up awesome forever!!!!


 My client wanted glass knobs, I love the classy look it created on this desk!!


I am currently accepting custom orders, if you have a piece you would like refinished send me a picture and dimensions to my email brooke.n.larsen@gmail.com and I will send you a quote!  Or if you are looking for something let me know and I can help you find it and get it refinished!

I hope everyone had a wonderful Thanksgiving and Black Friday!!!

TTFN

Brooke

LinkWithin

Related Posts Plugin for WordPress, Blogger...